
5 Fun DIY Wind Chimes To Hang On Your Porch
There’s nothing like sitting outside in the spring and summer while listening to the soft melodies of wind chimes as a gentle breeze passes by. Wind chimes can add beautiful sounds and colors to your outdoor space. Making your own wind chime can give you the exact creative look that you want. Here are 5 fun DIY wind chimes to hang on your porch.
1. DIY Seashell Wind Chimes

These DIY seashell wind chimes will make you feel like you’re by the beach no matter where you live! When the wind blows, the shells will gently clank together and produce a light and relaxing sound.
Pull out your collection of shells you have from the beach or buy some seashells from a craft store. Either way, you’ll be able to create a unique coastal style wind chime that can hang on your front porch.
Supplies Needed
Seashells
Beads
Fishing Line
Hammer & Nail
Piece Of Strong Wire
Instructions
Step 1: First, gently put a small hole in each shell with the hammer and nail. Make sure you have a sufficient amount of shells in case you break any.
Step 2: Cut about 5 string of fishing line, in the desired length. You can also have more than 5 strings if you want.
Step 3: Tie a bead to the end of the string, and then string on a shell. Continue to string on beads and shells until you fill up the string. Repeat with all of your cut strings.
Step 4: Next, you’re going to make the top of the wind chime. Make a large ring shape out of strong wire. Make sure it’s securely fastened together.
Step 5: Tie each string of shells onto the wire ring. Then, create a “hook” by tying an extra piece of fishing wire on the top of the ring. You’re done!
2. DIY Sun Catcher Wind Chime
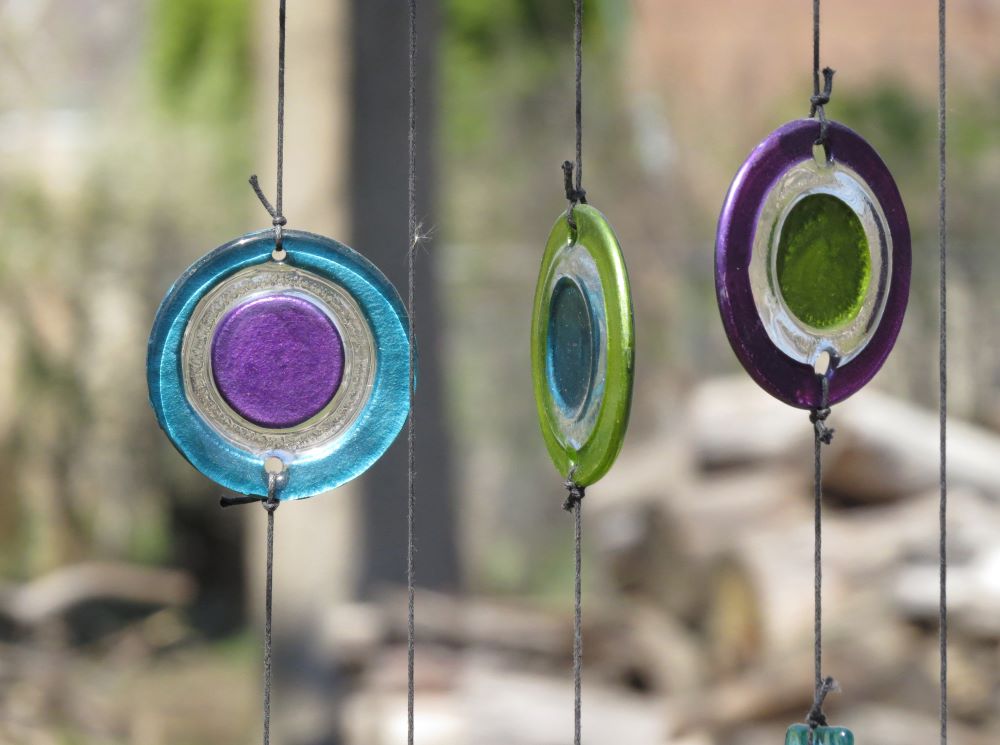
Combining beautiful colors and a unique glass sound, these DIY sun catcher wind chimes will look stunning hanging on your porch!
While these are made with plastic shot glasses, they result in a glass appearance that make a satisfying sound as they interact together in the wind. Be sure to take caution when making this craft because it involves melting plastic in the oven.
Supplies Needed
Plastic Colored Shot Glasses
Muffin Tin
Beads (Optional)
Fishing Line
Metal Loop
Drill
Instructions
Step 1: Preheat the oven to 200 degrees. Place a different colored plastic shot glass into each section of your muffin tin.
Step 2: Put the muffin tin in the oven and monitor it carefully. Take it out when the plastic is almost completely melted. Add another colored shot glass on top of each melted color and put back in the oven. Note: Be very careful when melting plastic in your oven. It will emit a strong smell. You can also choose to do this outside on your BBQ grill if you don’t want the smell inside your house.
Step 3: Monitor the muffin tin yet again until completely melted. Let them cool down before removing each plastic disc from the tin.
Step 4: Cut about 5-6 pieces of fishing line in various lengths. Then, carefully drill a small hole into each plastic disc towards the top.
Step 5: Start stringing your plastic discs onto each string, interspersing beads in between (optional).
Step 6: Tie your decorative strings onto a metal loop. Then, tie another piece of fishing line on the top of the loop so you can hang it up on your porch!
3. DIY Dog Tag Wind Chime
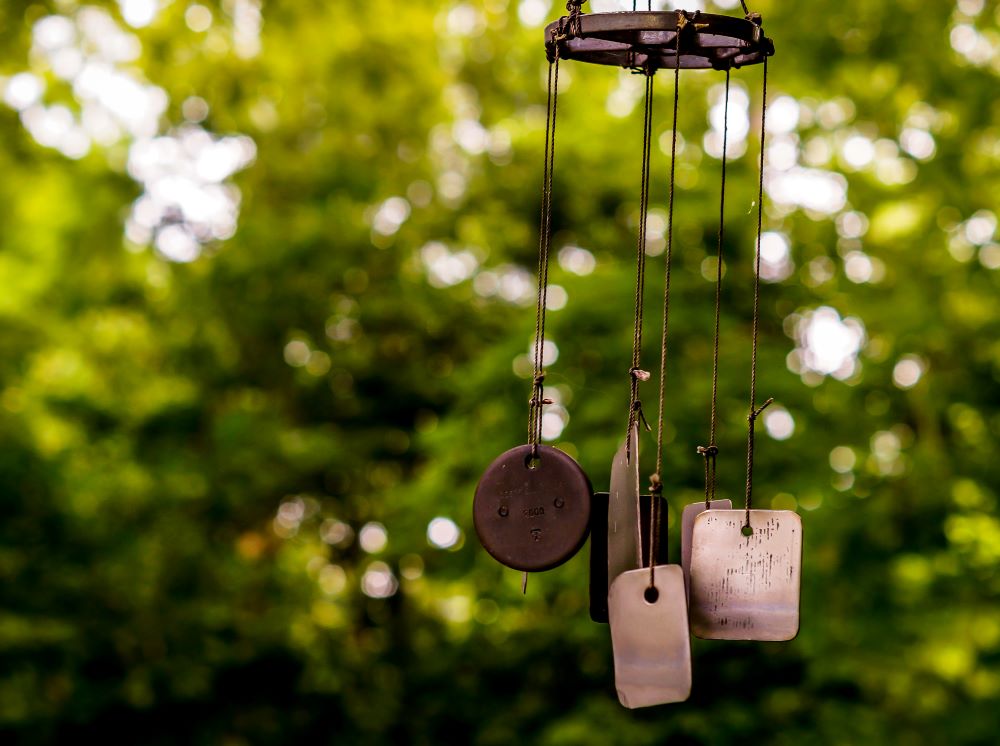
This craft will result in a warm rustic decoration for your front porch. The DIY dog tag wind chime combines simple materials and easy steps to give you a one of a kind wind chime!
You can find blank dog tags at most craft stores, along with other similar metal pieces that come in various shapes. You can use all of the same sized dog tags, or play with a variety of shapes and sizes. It’s up to you!
Supplies Needed
Metal Dog Tags
Other Metal Shapes (Optional)
Bronze Craft Ring
Copper/Bronze Paint
Fishing Line
Instructions
Step 1: If your dog tags are silver, paint them a bronze or copper color. Do the same with any other metal shapes you have.
Step 2: While you’re waiting for the paint to dry. Cut enough pieces of fishing line for each dog tag. Make sure each string is the same length.
Step 3: Securely knot each dog tag to the bottom of each piece of fishing line.
Step 4: Tie each piece of fishing line to the bronze craft ring.
Step 5: Tie another piece of fishing line to the top of the ring and hang up on a hook!
4. DIY Beaded Wind Chime

This DIY beaded wind chime craft is simple enough for you to do with your kids! The simplicity of it doesn’t take away from the final product, which is a beautiful decorative piece that will look nice with your spring and summer porch decor.
Feel free to use any colored beads you want and any combination of beads throughout your wind chime. The more colorful, the more interesting your wind chime will be!
Supplies Needed
Assortment Of Beads
Colored Embroidery Floss
Fishing Line
Metal Loop
Instructions
Step 1: Cut about 5-6 pieces of fishing line all in the same length.
Step 2: Creatively string your beads on the fishing line in any order you want. Wrap the embroidery floss on the fishing line in between each bead to help them stay in place. Continue this process until each piece of fishing line is filled with beads.
Step 3: Tie each beaded fishing line to the metal loop. Then, tie another piece of fishing line on the top to act as a hook. Hang up and enjoy!
5. DIY Ceramic Bell Wind Chime

This DIY ceramic bell wind chime is so easy; it simply involves tying together some materials. However, it results in one of the classiest looking wind chimes on this whole list!
Try looking for the most colorful and decorative bells at your local craft store. If you can’t find decorative ceramic bells anywhere, you can also go the extra mile and paint a design on plain white bells.
Supplies Needed
Small Ceramic Bells
Silky Cord
Metal Loop
Instructions
Step 1: Cut about 6 pieces of your silky cord, making sure they’re the same length.
Step 2: Using small pieces of the silky cord, tie bells to the middle of the long pieces, tying about 3 bells to each cord.
Step 3: Tie your strings of bells onto the metal loop.
Step 4: Tie another piece of silk cord to the top of the metal loop then hang it up!
Looking to add even more to your outdoor space this spring and summer? Shop Garden & Outdoors to find a selection of outdoor decor, solar lighting, planters, live plants and flowers, and much more!


Very helpful. Ideas and instructions very good and easy to follow.